
Something that really trips up both new sewers and experienced seamstresses alike when starting to sew bras is how to neatly sew the bra back hook and eye closures on neatly. These are some pictures I took for my sewing friend Maddie when she was having difficulty getting the hook portion to not skip when using a zig-zag stitch. She had to resort to using a straight stitch because she was getting results similar to above.
The main problem is the hooks drag against the needle plate more than the eye side causing the machine to just refuse to sew, skip or go crooked but fear not there are two possible ways around this.
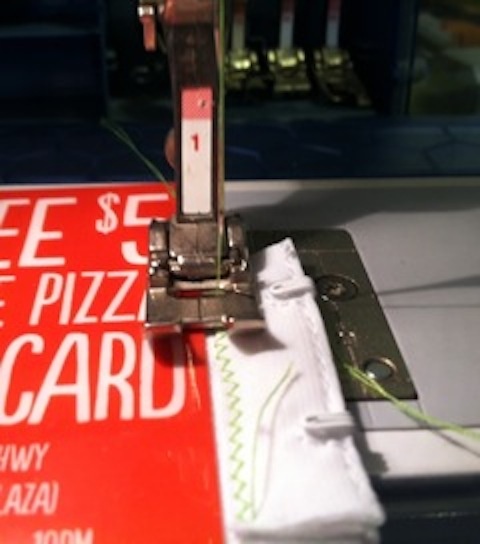
In general the problem with sewing the closures on is there is uneven foot pressure because the two sides are not level. By using a gift card as a shim and using the needle in the far right position with the hooks facing up you can get a better result.
Still not absolutely perfect so I switched to a leather roller foot. Unfortunately for domestic machines Bernina is only domestic sewing machine company to make a foot exactly like this. I use this for when I sew my shoe uppers. But it provides a constant feed the same as the feed dogs. But unless you have a Bernina or a high shank machine you’re out of luck on this particular doodad but there are alternatives for low shank machines.

I also use a foot like this for sewing the elastic one. It stops bunching and lumping. The image quality unfortunately isn’t great these were quick iphone pictures I did at the time but you can compare the two methods to the regular way. I think either are fine ways or getting a professional finish if you take a little more care than I did on these.
I sell both the bra back hook and eye closures and hook and eye tape in my Etsy store. I will be listing some more colors and styles soon.
https://www.etsy.com/shop/ArteCrafts?section_id=14775218&ref=shopsection_leftnav_10

Natasha, is the roller foot a Janome foot? I understood from what you wrote that you have a Bernina (me too). Do you use the Janome foot on a Bernina adapter shank (that piece which helps you to use a non Bernina foot). Which one: 75 standard or 77 short? It would be great if you could write more about how you use the roller foot, if you do find it helpful. My last question is: why not the Bernina roller foot? Because the rolling parts are smooth, not “rough” as Janome’s? Thank you.
LikeLike
The first foot is a Bernina a #55 foot for leather the second one is just a generic short shank foot attached to a generic adaptor. I got it on ebay. The picture is for a snap on one though but mine is a short shank. I didn’t want to pay much for it since I already paid the big bucks for the #55 foot which I use more often.
LikeLike
Though the smooth rolling foot is for sticky fabrics. That’s not what you want you need the teeth to act as a second set of feed dogs on the top to drive the fabric through to prevent skipping
LikeLike
I thought so, thank you very much. Your blog is very interesting. I like very much what you do and expect that your blog will be important for bramakers.
LikeLike
Thank you very much for this explanation! I was running into the same issue 🙂
LikeLike
No problem I’m glad it’s helpful considering the very crappy photos. I need to redo it.
LikeLike